
Jump Ahead To:
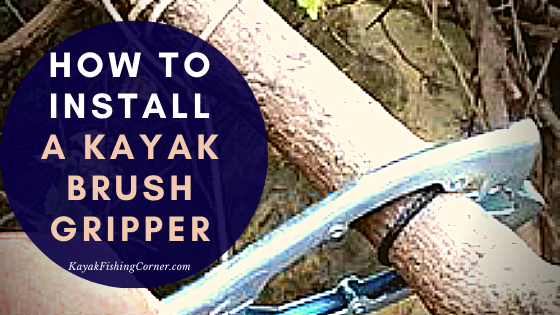
HOW TO INSTALL A KAYAK BRUSH GRIPPER – INTRO
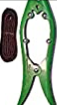
Kayak brush grippers are not as intimidating as anchors. But some people still struggle with the installation. Here’s a basic guide on How to Install a Kayak Brush Gripper. We list EVERY step and make this as simple as can be – that way, you are out on the water faster!
How to Install a Kayak Brush Gripper – Overview

Please note: This post contains affiliate links. An affiliate link means that we may earn advertising/referral fees if you make a purchase through our links.
Installing a kayak brush gripper is quite a simple task, but only if you follow the right process. I’m here to flatten the learning curve. I’ve prepared this guide to help people learn how to install kayak brush grippers and which one is the best for you.
The first section talks about what a kayak brush gripper is and why you need one. This will get you up to speed on brush grippers in a hurry and you’ll begin to understand why the are important for kayak fishermen of any level of skill or experience!
Next, I’ve provided a detailed guide on how to install kayak brush grippers. We walk you through the process, from start to finish. While each brush gripper may be slightly different than the next – if you follow our general guide, you’ll be well on your way and you’ll have a clear understanding of what the end result should look like.

Following that, there’s a buying guide to help you pick out the correct kayak brush gripper. I’ve compared grippers to anchors, so don’t miss this part. You’ll learn what features separate the best from the rest. You’ll become a knowledgeable consumer and will be able to quickly determine whether it is “time” for a new gripper as new models continually come to market!
After that, I’ve linked to my favorite kayak brush gripper. This is my personal choice, but I can bet you will feel the same way about it even after you’ve used it just once! By no means is the showcased model the ONLY high quality kayak brush gripper on the market – but we have used it, relied upon it, and feel that it would be a great addition to the gear collection of any kayak fisherman!
Lastly, I’ve provided my own experience in the “My Experience” sections. I’ve also summarized my thoughts in a pros and cons list. I hope you don’t think “pro” and “con” lists are too cheesy. I like learning from the experiences of others and I hope you do as well!
So let’s get on with the guide!
How to Install a Kayak Brush Gripper – Basics

Please Note: As an Amazon Associate, I earn from qualifying purchases.
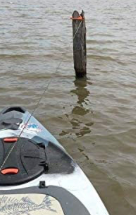
Kayaks, and particularly fishing kayaks, are always drifting about due to the impact of winds and currents upon the kayak’s frame. A kayak is long and skinny, and usually very lightweight – for these reasons, winds and currents can really push them around! And anchoring them is such a tough and time-consuming job – it can be difficult on the hands, arms and shoulders as well. What you need is a handy clamp that can grip onto any nearby bushes, and can be easily removed!
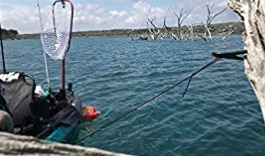
And that’s where kayak brush grippers come in!! A brush gripper consists of a cord and a clamp that tethers your fishing kayak to surrounding bushes and branches. This piece of equipment is most people’s go-to for fishing kayaks because it is small, lightweight, and packs quite a punch in terms of being able to safely anchor your kayak!

So why should you get a brush gripper over an anchor? Well, only after you learn how to install a kayak brush gripper, of course, but we’ll get there! Brush grippers don’t require a lot of setup, or really any special expertise or equipment for that matter. All you need to do is tie some knots, and you’re well on your way. And the best part about using brush grippers is that they’re easier to remove and re-clamp (when compared to an anchor).
Anchors, on the other hand, require more setup, and they can scare the fish away too. How? Because anchors are designed to be dropped into the water! That is not the case with brush grippers – they simply connect one part of your kayak to your above water anchoring point. Think of them as “surface anchors”. Brush grippers can also be used to secure your kayak if you’re going to leave it in the open. It will prevent your kayak from floating away (kind of like a kayak paddle holder keeps a floating kayak paddle from floating away)!
How to Install a Kayak Brush Gripper

Brush grippers require one-time installation and then you are all set. Here’s how you can set up your brush gripper. We go through each step, from beginning to end. Once you have read our guide, and tried the installation for yourself, please make sure to share with your friends so everyone can learn the proper way to do this!
- Unpack the gripper and the cord from the box.
- Check for any shipping damage before you proceed.
- Unravel the cord, pass it through one handle of the clamp, and pull it out through the corresponding jaw.
- Now pass the cord through the other jaw and pull it out from the corresponding handle.
- Make sure that there are just a few inches of the cord present between the two jaws.
- It is this piece of cord that tightens down on the brush as you pull the cord from the back.
- Now tie a knot where the two ends of the cord come out from the handles.
- Attach the other end of this cord to any accessory attachment hook.
- Pad-eyes are the best for this, but you can use water bottle holders and carabiners as well.
- And your kayak brush gripper is all set up!
- To store it, you don’t even have to untie it from the pad-eye.
- Either put the gripper in a pouch or in a sleeve.
- We suggest that you towel it down and allow it to air dry before storing in a cool and dry place (like the hull of your kayak)!
Side Note: After you have learned hot to install a kayak brush gripper, you might be interested in furthering your kayak fishing skills by learning how to use kayak outriggers! Oh, and once you have made the install, you can learn how to use a kayak brush gripper, here!
Read all about the ins and outs of the Best Kayak Brush Gripper!
Kayak Brush Gripper – Important Considerations

Clamp Material
Firstly, you need to consider what the clamp is made of. The clamp materials are instrumental in deciding the durability and strength of the brush gripper.
There is perhaps no better material to use here than stainless steel. This type of steel can withstand almost anything, from water to dirt and even impact damage. Stainless steel is considered in all sorts of applications owing to its tensile strength and beauty.
If you’ve got your eyes on a plastic or aluminum clamp, then you might want to rethink your choice. Plastic is not the most durable. It can survive the stride of time, but it has poor impact resistance and is liable to “snap” when placed under pressure (and the grippes do become subjected to pressure when the current and winds push and pull against them).
As for aluminum, this metal can survive the elements even better than steel. However, it’s prone to bending, which can happen a lot if you’re pulling on the brush gripper.
Cord Type
Next, look at the type of cord used. You want to look for elasticity and tensile strength in the cord. I think the best type of cord to use would be paracord. This is the same cord used in parachutes. It’s highly elastic, can withstand heat, water, and air pressure.
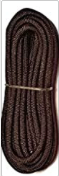
Your best shot here is 550 paracord. It’s the most common type used in brush grippers. You can try for the lesser type II paracord as well, or the tougher type IV paracord. This decision will depend upon the weight of your kayak, how long of a cord you want, and how much current or wind you want your brush gripper to be able to stand up to!
Paracord is widely available. Almost all good brush grippers will be using a paracord. However, if you had to go for other options, then try nylon or polypropylene. Nylon is the stretchier of the two, and is used in anchor lines and towing. If you want to “extend” your rope, you can find paracord down at the local hardware store – not too expensive!
Cord Length
The length of the cord is what most people overlook and end up getting disappointed later on. Cord length is crucial as it decides how much you can move in the water. The standard cord lengths are 8 to 9 feet.
But an 8-foot cord won’t give you 8 feet of distance from the gripper. As mentioned in the installation guide, the cord will be looped once. So 8 feet of paracord will give you only 4 to 3.5 feet of length.
This is the part that most people don’t understand. If you want to be able to move ever so slightly in the water, try for a longer cord of 10 to 12 feet – remember, you can buy more as we describe above, but you’ll want to be very careful in terms of connecting the existing paracord to the new paracord to ensure a tight connection! Now, you don’t want to stray TOO far from where the gripper is attached – so we suggest that you don’t go over ~25 feet in length!
Kayak Brush Gripper vs. Anchor
Now comes the real question: what’s better for you, a kayak brush gripper, or an anchor? Here are my thoughts on this issue.
While kayak anchors are definitely more secure, they lack the ease of setup that brush grippers give. Anchors require a lot of strength to let down. Secondly, you need to purchase an anchor trolley if you want the true benefit of stability.
Brush gripers, on the other hand, require only a minimal amount of setup. And unlike trolleys, which require you to drill in pad-eyes, brush grippers can be set up by anyone. Anchors also require a lot of manpower to pull them out of the water.
Want to stay comfortable in your fishing kayak for longer? Look into whether the Best Kayak Seat could be right for you!
Buy The Best Kayak Brush Gripper

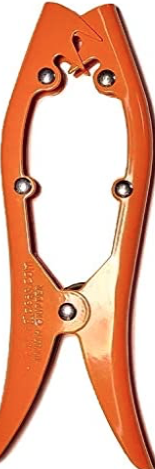
If you’re really interested in buying a brush gripper, then I can’t think of anything better than the brush gripper that I have showcased for you above. Why do I recommend it? It’s simple, lasts long, and I’ve tested it to be 100% unbreakable (under reasonable kayak fishing conditions, of course).
It pretty much fits everything a standard brush gripper should have. Starting off with the clamp, it’s made from powder-coated steel that’s been stamped and bent. Lets’ break this up into a couple different pieces:
Powder-coated steel is one of the most durable coatings, right next to galvanized steel. The result of powder coating over galvanization is the lower cost and the amount of decorative flexibility. It is because the brush gripper is bright orange in color, making it visible in the water (and, thus, making you more visible to other boaters on the water and improving the safety of everyone).
Bending and stamping are processes where the steel is warped to the desired shape. I’d say that it’s quite strong, but welded steel is even stronger. It’s designed to withstand freshwater, but the quality will degrade in saltwater.
As for the cord, this brush gripper uses a 550 (Type III) paracord. For those of who you don’t know, 550 paracords can withstand a force of 550 pounds. And all paracord can stretch up to 30% of the original length.
The use of paracord is an exceptional idea here. It’s flexible, tight, and can withstand heavy pressure. The cord is 9 feet long, giving you about 4.5 feet of distance from the brush gripper. Remember, you can buy more if you want to get “longer” – just make sure to buy the same grade and tie a proper knot!
You also get to see the signature “the harder you pull, the tighter it gets” phenomenon in action. It kind of functions like a Chinese Finger Trap – if you remember that popular children’s toy!
My Experience

So now you know how good this particular kayak brush gripper is. But what are my thoughts on it? Well, my experience with this brush gripper has mostly been positive. It’s an excellent tool that can keep you anchored in place for hours at a time – a super critical component of any kayak fishermen’s game!
If there was anything that I didn’t like, it would be the cord’s length. I’m the type of person who prefers more mobility. The cord was just too short for me to move my kayak around safely – plus, sometimes I need to be able to maneuver as the fish move, the winds change direction, or the current slows. But if you like to be stationary, the brush gripper keeps you grounded quite well.
Another thing to note is that this brush gripper won’t survive long in saltwater. It’s meant for use in freshwater lakes and rivers only. The powder coating will start to degrade, and the metal underneath will rust. You can, of course, slow this process by drying the gripper with a cloth after each use and allowing it to fully air dry before storing in a clean, dark and dry place!
So here are my final thoughts on the showcased brush gripper – this time, in “pro” and “con” form for your quick summary and reference!
Pros:
- The clamp is water-resistant and corrosion-proof.
- Can clamp down on medium to thick brush, limb, docks or other anchoring points.
- The cord is highly flexible.
- It can withstand the weight of heavy kayaks.
- Highly cost-effective (especially in terms of the value it provides).
- Gets tighter as the wind or current pulls on you.
- It has multiple applications in fishing and camping.
Cons
- Degrades faster in saltwater (mitigate by thoroughly drying after use)
- Cord length doesn’t provide mobility (but more Type 3 paracord at the hardware store).
Conclusion

And that’s it for how to install a kayak brush gripper! Don’t you feel like you’ve learned MORE than you every thought you could POSSIBLY learn about such a product? I highly anticipate that this guide helped you! Heck, it has even helped me while writing it!! So many people struggle with setting up brush grippers. But take it from me, brush grippers are the easiest to install – you just gotta read the instructions and give it a shot!
The showcased brush gripper is one of the best for everyday kayak fishing use (in the fresh water, of course). It doesn’t cost much and you get a TON of value out of it! This gripper is your perfect companion for fishing trips and kayaking!!
Comments

So what do you think about my suggestion? Has this kayak brush gripper worked for you? What kind of waters have you tried it in? Did you notice that it tightened up and thus had a better grip when pulled? Perhaps you’ve found some other kinds of brush grippers that you’d like to share with the group? Be sure to et me know in the comment box below! We read and reply to every comment and love intreating with the kayak fishing community!