Jump Ahead To:
HOW TO USE KAYAK OUTRIGGERS: INTRO
Before you devote time to learning how to use kayak outriggers, KFC suggests that you visit our Kayak Outrigger Ultimate Guide. The Ultimate Guide is the perfect resource to be used for building your kayak outrigger knowledge before learning all of the different ways how to use kayak outriggers to improve your kayak fishing experience.
Just the Basics
First, as an Amazon Associate, I earn from qualifying purchases.
In this KFC post, we have included all of the important details to help you learn how to use kayak outriggers. To make this topic easy to follow, we have organized this article into several separate categories. First, we have a short “how to” checklist to ensure that you learn how to use kayak outriggers as efficiently as possible. Then, we go over some of the features we always suggest that our readers look for in kayak outriggers of their own. Next, we include two links to two of the best kayak outriggers presently on the market – they are our favorite! Finally, we include a brief write up of our own experience when learning how to use a kayak outrigger.
Shortcut to Our #1 Choice
Shortcut to Our #2 Choice
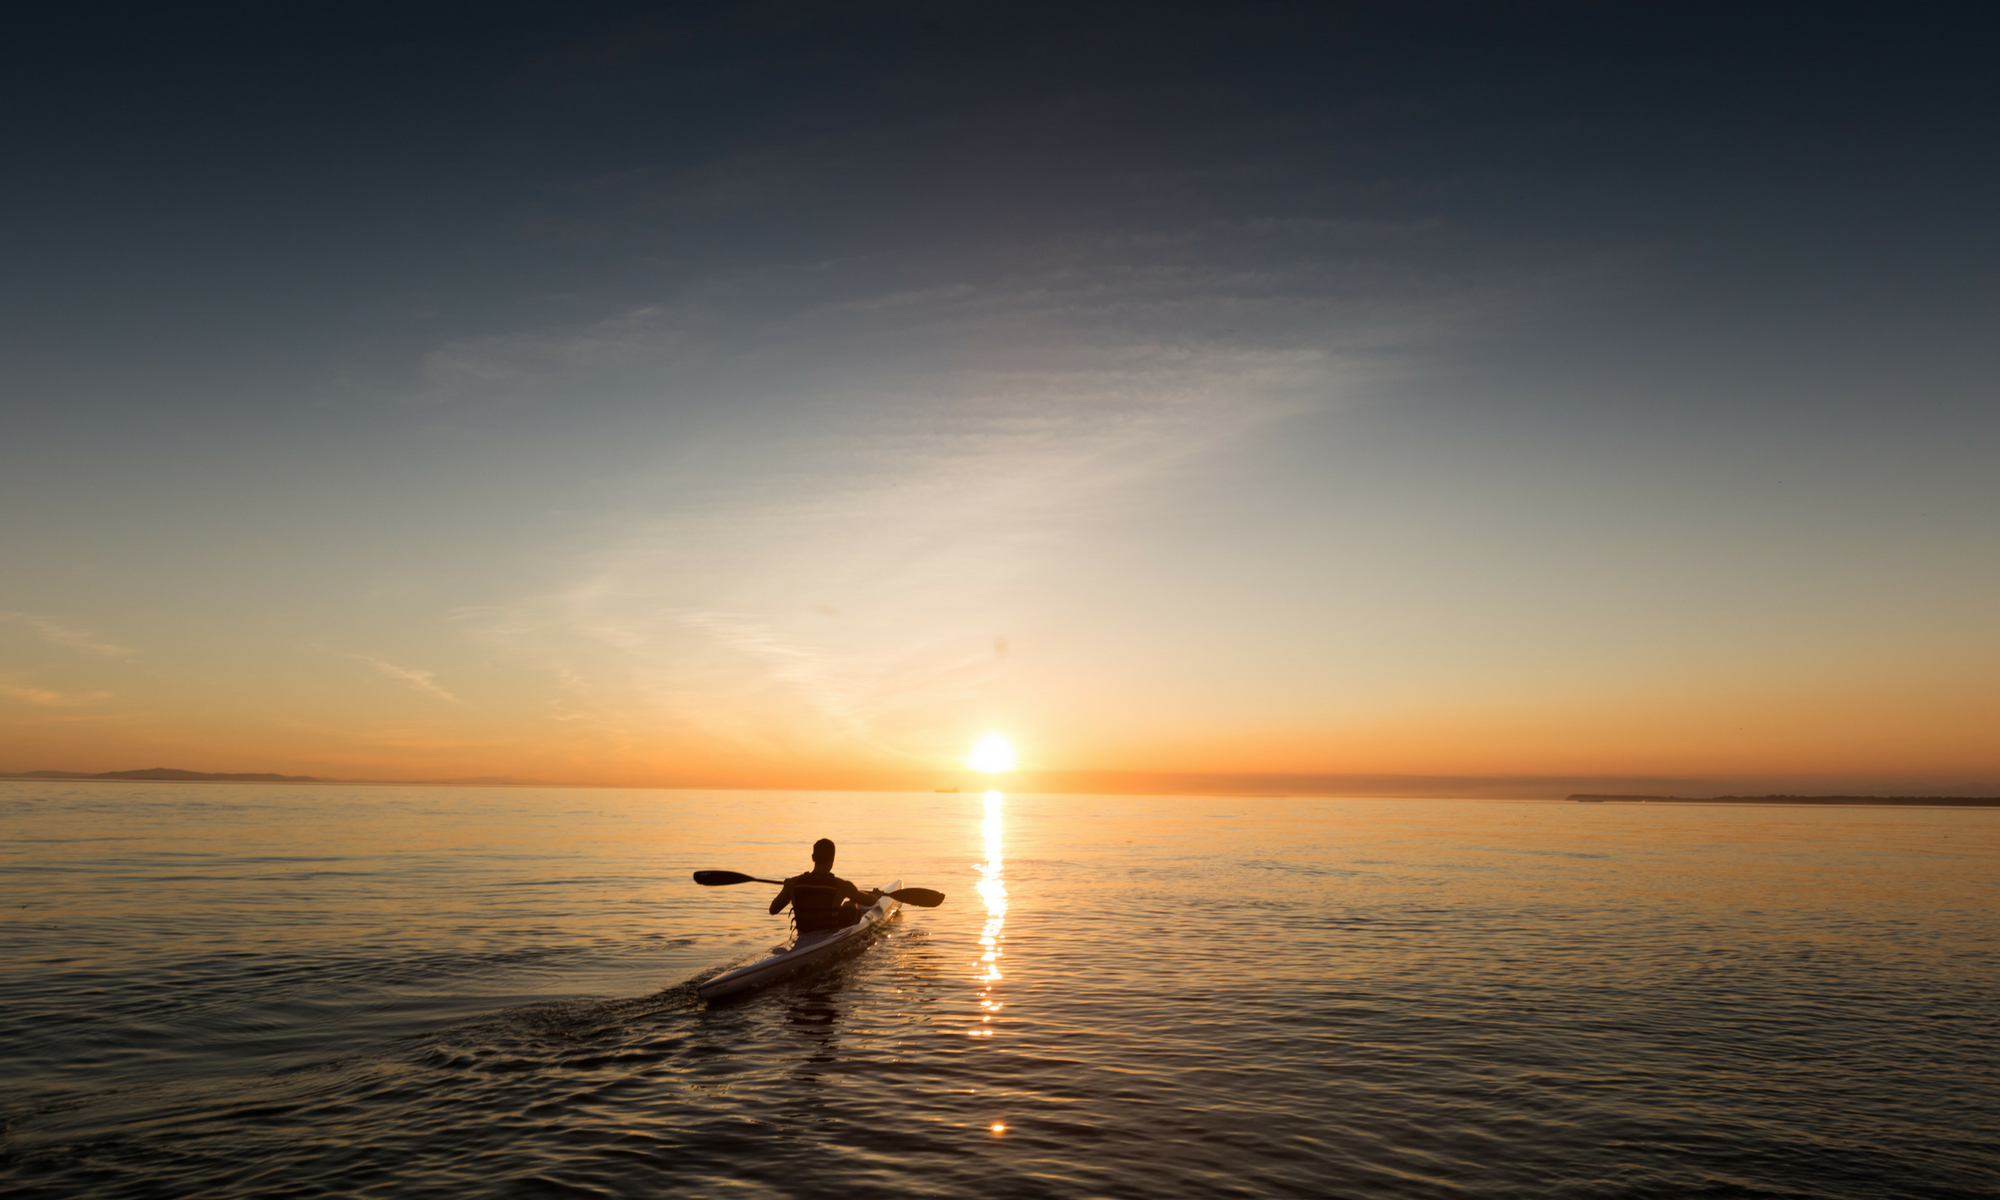
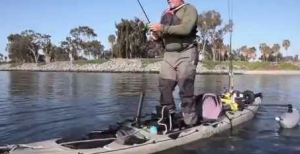
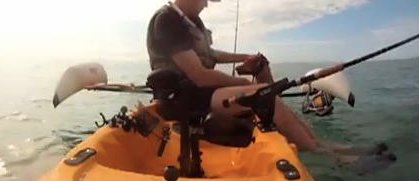
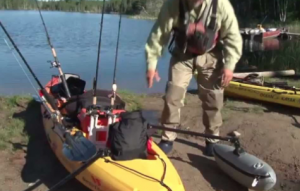
We were surprised to learn that even the most experienced kayak fishermen will frequently be inexperienced when it comes to appropriately using a kayak outrigger or kayak “stabilizer” as they are sometimes called. Of course, there is nothing wrong with that. in fact, it is for that very reason that we decided to write this post on how to use kayak outriggers! Just to make sure everyone is on the same page, take a look at the image below. This picture shows a kayak fisherman fishing from a kayak that has been fitted with kayak outriggers. See how much more balance and stability he has?
One of the most obvious benefits of learning how to use kayak outriggers is that you’ll be able to sit, stand, and then sit again, all without having to make any adjustments to your fishing kayak. Being able to alter your position while within your fishing kayak actually directly results in increased levels of success while on the water! How? Well, sitting and standing in an alternate manner allows you to stretch out, thus becoming less fatigued after long periods of time spent sitting on the water. The less fatigued you are, the longer you’ll be able to stay on the water. The longer you stay on the water, the more fish you are going to catch!
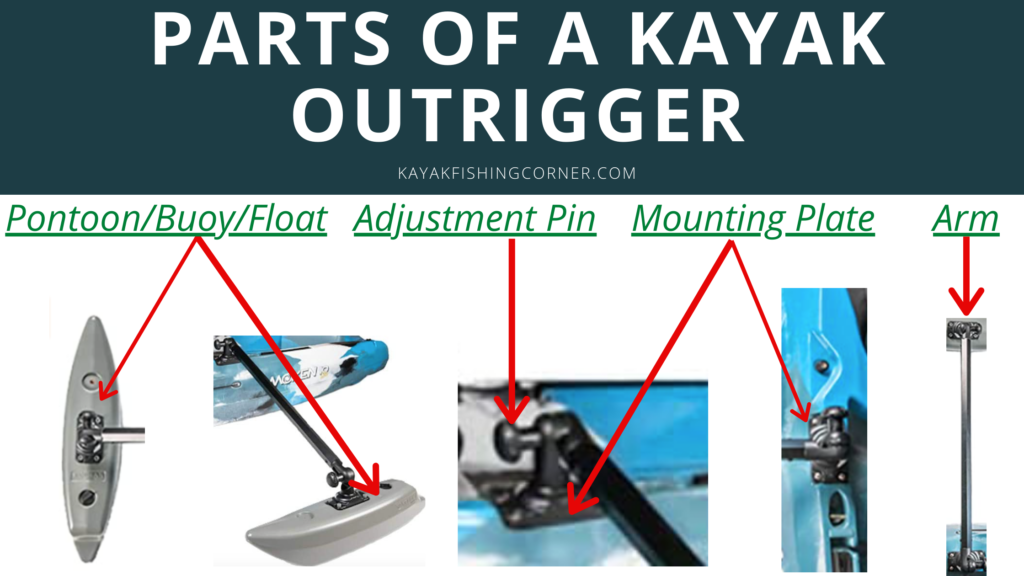
Parts of a Kayak Outrigger
How to Use Kayak Outriggers
Please note: This post contains affiliate links. An affiliate link means that we may earn advertising/referral fees if you make a purchase through our links.
Let’s dive into some outrigger basics. Remember, we need to start with the basics. You won’t have much use for a kayak outrigger if you aren’t sure how to properly attach it, much less use it! We’ve created the below checklist to act as a short guide. It should have you up and running in no time!
- Pick a spot on the kayak where you want to locate your kayak outrigger
- We think the best location is between roughly 2/3rds and 3/4ths of the way towards the back of the fishing kayak.
- Placing the outrigger near the back of your boat ensures that the outrigger’s pontoons will remain out of the way of your paddling stroke.
- Placement towards the rear also results in less risk of entanglement of the fishing line and other pieces of gear.
- Finally, installing the outrigger towards the back allows for more stability, as kayak fishermen usually stand close to the back of the fishing kayak, right in front of the kayak’s seat, while they are casting their lines.
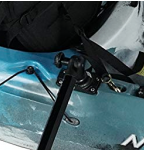
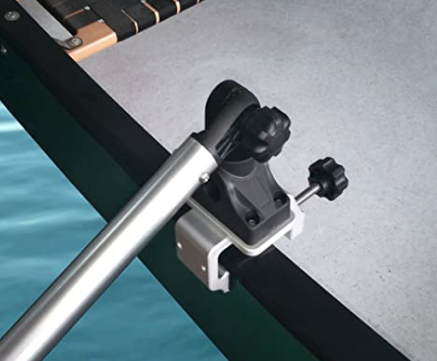
- Once you’ve decided on a spot, safely secure the kayak outrigger to the hull of the fishing kayak.
- The best way to do this is to use the mounting hardware that came with your outrigger. If done correctly, it should look something like the example below:
- After installation is the best time to attach your pontoons to the arms of the kayak outrigger.
- It is critical that your pontoons are safely attached to the outrigger arms.
- No matter what, do not let them become detached while you are out on the water, they’ll float away and you’ll have trouble reattaching them.
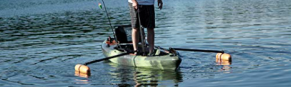
- Next, adjust the height (or angle) of the kayak outrigger arms.
- The desired angle is based on the type of water condition you are facing.
- Angle them upwards if you only want them to engage when the fishing kayak is leaning far one way or the other.
- Tilt them nearly parallel with the water (like the example below) if you want them to move in evenly along with the fishing kayak.
- You can also adjust them slightly downward if you want to put pressure on the water. This creates the most level of resistance, but can also slow you down!
- Do not angle the outrigger at too steep of an angle downward, because doing so will put a lot of strain on the connection point. It may even result in damage to the kayak’s hull!
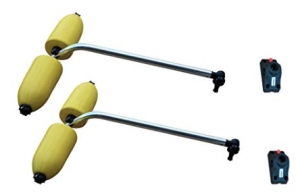
One of our Favorite Models of Kayak Outrigger

This “Generation 2” model has set a high bar for outriggers that may follow it. It was clearly built with a kayak fisherman in mind. KFC really likes the customizable angles at which the outrigger arms may be set. Also, the installation was very easy – and we are by no means the most handy of handymen! For instance, if you can install a kayak motor mount, then you can definitely install an outrigger with no problem!
Type of Material. The hard plastic material certainly differs from other outriggers that feature aluminum. The hard plastic results in an outrigger coming in at just about 6 pounds. Don’t let the word “plastic” deter you from seriously considering this outrigger. We’ve found that it is very rigid and is more than capable of standing up against large waves and swift currents.
Length of Arms. At 30″ in length, this outrigger’s arms are completely adequate in terms of being long enough to create the desired level of balance, while being compact enough to avoid maneuverability concerns. Remember if your kayak is ~24″ across, you’ll have expanded your width from 24″ to a whopping 84″! The larger the width, the easier it is to stand and cast!
Type of Buoys. The buoys on this model are designed as single pieces, as opposed to the dual buoys on the prior model. There isn’t much difference, in effect, among the two designs. However, we like the ability to replace a damaged buoy with ease.
It is easier to find replacement buoys for other outriggers, as this particular models are customized to their particular outrigger. Now, that being said, the buoys on this model are quite durable, so as long as you don’t subject them to needless abuse, you shouldn’t have to worry about replacement for a long time! The buoys are dark grey in color, which is a negative when compared to the more brightly colored models. The more you stand out on the water, the safer you are from neighboring vessels!
Adjustability. As you can see from the photograph above, this outrigger is highly adjustable. Again, we found that the adjustment was quite easy – no special tools required. Once you find the desired angle, it is easy to “lock” the outrigger at the particular point.
Also, you can adjust the arms to be set at different angles. Perhaps you are only casting to one side of the boat, and therefore want your outrigger to be adjusted upon the surface of the water on that side. It is very easy to do, and the other arm can be set however you see fit!
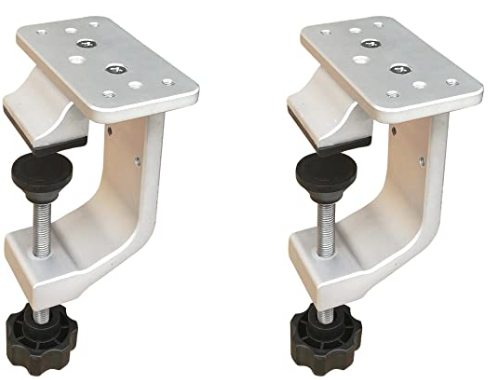
Additional Features! We like that the Stainless-Steel Installation Hardware has been included with the product. The installation of the outrigger to the hull of the kayak is where the “rubber meets the road” in terms of kayak fishing. If you have a weak connection point, you are very likely to damage your outrigger or your kayak. Stainless-steel not only looks good, it will hold up to the constant flex experienced while an outrigger is “at work”.
Overview of Kayak Outriggers
The purpose of a kayak outrigger is to make sure that a fishing kayak maintains its stability and balance at all times. This means that, if you learn how to use kayak outriggers correctly, you’ll be much safer when traveling across the water, whether by paddle or by kayak trolling motor. Yes, we said “at all times”, meaning that the kayak outrigger is also important when you are trying to remain in one location, like when you’ve finally made your way to your favorite fishing location and want to stand and cast with greater balance and proficiency.
If you want to learn how to use kayak outriggers, you need to understand a basic principle of physics. Now, we at KayakFishingCorner.com are much more interested in the great outdoors than we are science, but we are willing to spend a little bit of time learning if it makes us better kayak fishermen! Kayak outriggers are designed in such a way as to increase your surface area, which also results in a counter balancing system. Basically, if pressure is pushing against one side of your fishing kayak (think in terms of a large wave, quick current, or even a straight-line wind), the kayak outrigger will “push back”, transferring the pressure by sending it safely through to the other side of the fishing kayak. Cool huh? Well, thats enough physics for us!
We would be misleading if we did not mention that kayak outriggers are not always going to be needed for each and every one of your kayak fishing trips. Frequently, if not most of the time, your body of water may be calm enough that the kayak outrigger never serves much purpose. Remember, even if it doesn’t serve much purpose, it also wouldn’t disadvantage you. You’ve certainly experienced it, as we know we have; Water conditions are dynamic. Because you are not burdened by a kayak outrigger’s presence, why not keep it installed and available? After all, we are better off having the kayak outrigger but not needing it, instead of needing the kayak outrigger and not having it! Better safe than sorry! That’s the KFC motto!
How to Use Kayak Outriggers: Important Features, Quick Tips

- Length – Your kayak outrigger should be roughly 30 to 36 inches long. This length, when multiplied by two (because you will have two kayak outriggers) and added to the width of a standard fishing kayak, will result in a surface area of well over 9 feet, roughly 300% bigger than the surface area of a fishing kayak doesn’t benefit from an outrigger system. Remember the basic principle behind the why and how to use kayak outriggers – the greater the surface area, the greater the amount of control and balance you will have!
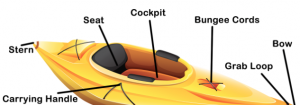
- Location – The kayak outriggers should be located near the read of your fishing kayak. We like to place ours about 3/4ths of the way toward the stern, just behind the seat. Doing so will keep the kayak outrigger out of the way of your paddling stroke, and will ensure that your line does not become tangled in the arms of the kayak outrigger. Can’t remember the difference between the bow and the stern? Take a look at the guide below.
- Pontoon – An under appreciated component of a kayak outrigger, and one that is very important to understand in your quest to learn the proper way to use kayak outriggers, is the pontoons. The pontoons are the small floats located at the end of the kayak outrigger’s arms. The more buoyant the pontoons, the greater the ability of the outrigger to provide stability and control while on the water. We tend to believe that pontoons made of molded PVC are the best performers for kayak fishing purposes. Why? Their durability, buoyancy, and safety are top notch. Safety? Yes! Most pontoons have the added benefit of raising the level of visibility of fishing kayak, as they are often colored bright yellow or orange!
- Adjustability – There will be instances where you desire to raise your kayak outriggers up and out of the water. You might want to do this when you need to move swiftly. There will be other instances when you’ll want to change the angle of the kayak outrigger, like when you need to expand the surface area to help you push back against strong winds and big waves.
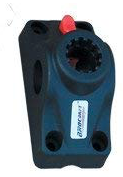
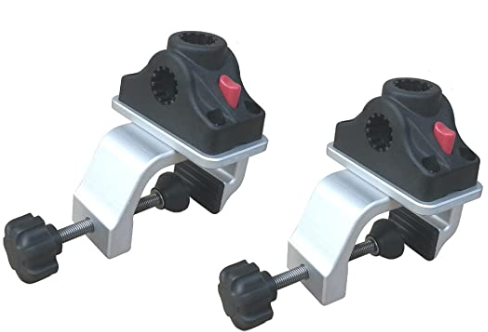
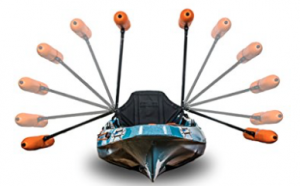
To do this, you’ll what to make sure your kayak outrigger comes with a device that includes an internal ratcheting system. The internal ratcheting will allow you to adjust the kayak outrigger arms to create a number of different angles. Take a look at the close up image below. When learning how to use kayak outriggers, a mastery of angles and configurations is important!
Altering the position and angle of the kayak outrigger arms allows you to deepen the rudder into the water. As the rudder is lowered, you will be able to keep your fishing kayak on a more straight and narrow course. You can also manipulate the outrigger arms to increase the amount of pressure you are putting on the water.
Why would you want to increase the pressure on the water? Because it enlarges your surface area, and an enlarged surface area will create a counter balancing which is the ultimate goal of any kayak outrigger system. Once you become correctly counter balanced, you will experience increased stability and control. Casting from the standing position has never been easier! But you’ll never experience this stability if you don’t first learn how to use kayak outriggers!
Another Favorite Model of Kayak Outrigger

There are a number of kayak outriggers available on the market today, but only a handful of them are worthy of recommendation on KayakFishingCorner.com. The one we have showcased above is definitely one that fits the description of worthy of a recommendation!
As you’ve read through the list of important features above, you’ll see that this particular outrigger ticks all of the boxes. The length of the outrigger arms is sufficient to afford you proper stability in any water condition (even in the ocean)! The adjustability allows you to make changes while you are out on the water, something that is critical for those of our readers who find themselves out on the water for hours on end. The pontoons are highly durable, very buoyant, and come in a bright color, perfect for adding to your visibility in the early mornings or late evenings!
This is one of the most popular outriggers for kayak fishermen – regardless of skill or experience level! It has been on the market for a number of years now and the manufacturer has adapted the design to work out any kinks. This is evidenced by their two year limited warranty – an eternity when compared to other kayak fishing products!
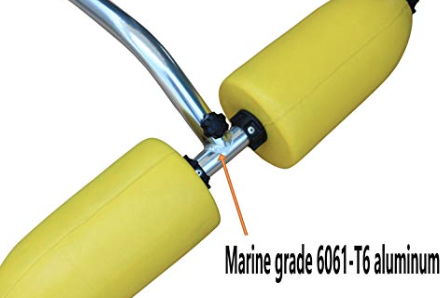
Materials Used. This outrigger weighs just under 9 lbs. This light weight is attributable to the usage of aluminum (as opposed to a heavier metal). Lightweight arms are an important consideration as the lighter they are, the easier they will be to lift from, and lower into, the water.
Aluminum is rust resistant, so the arms will keep their shine for years to come (assuming you protect against corrosion, of course). The buoys are made of molded PVC, which is an ideal material to ensure that they hold up against dents and dings without jeopardizing their buoyancy.
Length of Outrigger Arms. The arms on this outrigger measure 32″. The longer the arms, the more surface area created, and the more surface area created, the greater the level of balance obtained. Of course, there is a drawback to having too long of arms, as longer arms would cause for maneuverability issues. KFC prefers outrigger arms that measure anywhere from 25″ to 35″, and this model falls right in the sweet spot!
Buoys. The molded PVC buoys are actually in two pieces per arm, resulting in four total buoys. This is a novel bit of engineering and is actually a great design as it allows for a buoy to be easily replaced in the unlikely event that it becomes damaged of compromised. KFC likes the bright yellow coloring of the buoy because it helps create greater visibility on the water. Many other outriggers are black or gray, and the Brocraft model has a serious advantage on this front.
Adjustments. This model of outrigger is highly customizable, with arms sitting in a ratcheting-based mechanism (made of high quality stainless steel). We’ve found that adjusting the arms while on the water is quite simple (doesn’t require any special tools). The arms can be set to any number of angles, allowing the fisherman to assert just the right amount of pressure against the water, or to lift the arms completely up and out of the way with ease!
Extra Features! The two year limited warranty is really, really impressive. As earlier stated, you simply don’t find this long of a warranty in the kayak fishing space. KFC interprets this to mean that the manufacturer is seeing a very low return ration on this particular outrigger – meaning that very little is going wrong and very few warranty claims are being made. Featuring aluminum arms and stainless steel mounting gear, its easy to see that the outrigger is made of high quality materials!
How to Use Kayak Outriggers: My Experience
Recently, as you may have learned by readying some of KFC’s other articles, I have begun to use my kayak outrigger for ocean related kayak fishing! The ocean can be a very challenging kayak fishing destination, and by no means did I try out kayak outriggers for the first time while on the high seas! No way!
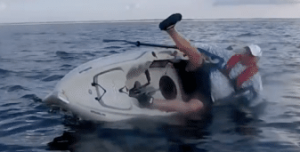
Prior to learning how to use kayak outriggers, or even owning a kayak outrigger myself, I experienced a very scary and abrupt change in weather conditions while on the waters of nearby lake. My luck on the water was distracting me from watching the water like I should have been.

Next thing I knew, 50 mile per hour winds came racing through! The high winds, added with the wakes of all the motor boats scattering for shelter from the storm, was nearly enough to overturn my fishing kayak!
Aside from the frigid water, I had many hundreds of dollars worth of kayak fishing gear and accessories on board with me, not to mention my kayak itself. All of this would surly perish to the bottom of the lake if I capsized! When I finally reached the safety of the shore, I decided that it was time to buy a kayak outrigger. It simply wasn’t worth it to go kayak fishing, even if the forecast called for safe and calm conditions, without the safety of a reliable kayak outrigger! But first, I needed to learn how to use a kayak outrigger in the first place!
Also, its worth mentioning that a particular piece of kayak fishing gear known as a kayak “trolling motor” goes really well with a kayak outrigger set up. The trolling motor provides you the power and control you need to maneuver from location to location, while the outrigger ensures that you stay balanced. Take a look at KFC’s suggestions for the top 3 kayak trolling motors and see if you agree that it would help you with your kayak fishing outings! We’ve also added a link to KFC’s write up about the best kayak trolling motor battery for use in safely powering your new trolling motor!
SCORES
Quality – 4/5
Now that you’ve learned how to use kayak outriggers, you’ll want to think about which kind of outrigger will suit your needs the best. This is where it is very important to consider quality. Luckily for you, quality has come a long way recently! We have personal experience with each kayak outrigger linked to above and know that they will treat you well. Each is built with quality parts and materials. They also contain reinforced joints so that they won’t wear out in short order!
Performance – 4.5/5
Your performance with a kayak outrigger is certainly going to improve now that you’ve learned how to properly use one. Since you’ve been properly educated, you should be able to rely on your outrigger to hold up its end of the bargain! While not all kayak outriggers on the market are high performers, we are happy to report that the ones we have linked to in this outrigger review have earned high marks! Just remember to make sure you have the proper angle set for your outrigger (not too steep, not too shallow) and then let this awesome kayak fishing accessory do the rest of the work for you!
Price – 4.25/5
You can find a reliable kayak outrigger for between $100 and $200. There are also a number of websites that show how to build you own kayak outrigger. These usually have plans or designs that allow for you to build an outrigger out of supplies and materials you can find down at your local hardware store. While this might be a fun project for some of you “handyman” types, we think we’d rather rely upon someone else to work out all of the kinks! We don’t mind paying a few extra bucks to find a reliable kayak outrigger that has been designed by someone with years of experience!
Durability – 4.25/5
We’ve used our kayak outrigger in the hot, cold, sunny, cloudy, and just about every type of wether condition in between. What’s more, we’ve taken it to saltwater (down in the Gulf of Mexico) and freshwater (in a lake near southeastern Oklahoma). We are happy to report that its materials and design allow for it to hold up very well! Sometimes saltwater can have a deteriorating impact on certain types of plastics, but not the materials used in this outrigger! The same can be said for excessively cold weather, but even then this kayak outrigger passed with flying colors!
Overall – 4.25/5
At an average score of 4.25 out of a possible 5, you can see that we scored this kayak outrigger quite highly. We have been pleased to see that the manufacturer has used quality parts that help in both the durability and performance. If I had to do it all over again, I would have bought a kayak outrigger much earlier. It is easy to install (takes less than an hour), easy to use, and is removable for when I am fishing a body of water that won’t require the extra stability. We think a kayak outrigger is a “must have” piece of kayak fishing gear. Be sure to write in and let us know your thoughts!
HOW TO USE KAYAK OUTRIGGERS: SUMMARY
One thing that we have not yet mentioned is that a kayak outrigger will not be a “permanent” addition to your fishing kayak. It is easy to snap the outriggers on and off as your needs change. Yes, this can take some time, but its actually rather easy and does not require special tools. We love the flexibility of this “on again” and “off again” kayak fishing accessory!
I hope this article has helped you learn more about how to use kayak outriggers. They really are a great kayak fishing accessory for beginners and professionals alike! If you have any detailed questions about how to use kayak outriggers for kayak fishing, or if you have any helpful hints to share with the kayak fishing community, please make sure to share by commenting towards the end of this article. We love the feedback!
KayakFishingCorner.com continually researches the kayak fishing market to determine if other types of kayak outriggers come onto the market! If you’ve become inspired by your newfound knowledge of how to use kayak outriggers, and have decided to buy one for yourself, KFC is sure that you’ll be thrilled with any of the different kinds of outriggers we’ve linked to above! Check out our favorite kayak outrigger for kayak fishing! While you’re here, learn other ways to improve your balance to aide your kayak outrigger!
Looking for some additional tips and tricks, take a look here for an educational guide!
Comments
Do you have any questions about how to use kayak outriggers? What about kayak fishing in general? Want to share a helpful tip? Please share with the rest of the KayakFishingCorner community by posting in the Comments section below! We love to hear from you!
I built my own outriggers using 1″ PVC and crab floats. My outriggers sit out about 30 inches on either side of my Vibe 10′ Yellowfin 100 kayak and about 3″ off the water. I set them high to allow me to use my trolling motor and paddles without the drag of the outrigger floats. My primary objective is to avoid rolling over due to boat wakes. Nearly all the web links show them at the water level. Do you see any issues with setting my floats 3″ above the water line?
Hi Rod!
Building your own is an option that we often see with respect to kayak outriggers. Crab floats are a really good idea, you must be located near the coast! I understand why you’ve decided to locate the floats 3″ from the water, and doing so is not a problem at all! You are correct that it reduces drag, while still protecting you from accidental roll over! Just make sure to avoid setting them too high (10″ or so) as this will allow your hull to take on water when you roll to one side or the other, even if you don’t accidentally flip!
Best of luck out there!
-DS
Thanks for this information!! I just bought kayak outriggers for an upcoming trip and this helps me know what I’m suppose to do with them. Now, just gotta catch a fish or two!!
Thanks for your feedback, Ship!
We agree that outriggers are a HUGE bonus for all different kayak fishermen! It really is far safer on the water, and way easier to stand and cast! Does it lead to catching more fish? You’ll have to write back and let us know!
Be safe out there!
-DS
Great info! Thanks for the outrigger tips, DS!
You are welcome! Be sure to reach out if you run into any problems!
Do you prefer to install it on the front or on the back of the kayak ?
Hi Luis,
I always suggest mounting on the middle or towards the rear of the kayak. Let’s think of it in terms of fractions. So, if there are 4 quarters to a kayak, 0/4 1/4 2/4 3/4 and 4/4, I would suggest mounting at 2/4 (halfway) or 3/4 (halfway between the middle and the back).
Make sure you consider what your unique paddling stroke looks like, as you don’t want your outrigger’s arm to interfere with your stroke!
Let us know what you end up picking!
DS
so i have acquired a Sea Eagle Se 330 inflatable (maybe that’s a dirty word for die hard kayakers…inflatable that is) i would like to add stabilizers but obviously this presents a mounting issue. At this point my prelim. design involves PVC and will likely be a morph of the rod holder storage concept i was already considering…also on chesapeake bay so crabpot floats will be abundant and part of the design…if anyone has ANY thoughts or advice before i start cutting and praying i’d love the feedback/advice/encouragement.
Hi Michael –
Not so fast! Many kayak fishermen choose to conduct their fishing from an inflatable kayak! They can actually be really great for tons of different fishing venues (check out our post on inflatable fishing kayaks). Now, as you’ve stated, there are difficulties with outriggers here.
I don’t think your PVC/Rod Holder idea is too far off the mark, but it may put significant strain on the junction point if you are dealing with very large waves.
This may sound kind of crazy, but I have had good luck by simply strapping large inflatable vinyl boat buoys to the side of my kayak with a bungee cord (check out our post where we review the Top 5 Straps for Kayak Trailer). It doesn’t look “great”, but it has done the trick and allows me to stand and cast a little easier!
Let us know what you end up doing here!
-DS